Leave Your Message

10 Effective Tips for Using Drone Led Lights for Stunning Aerial Photography

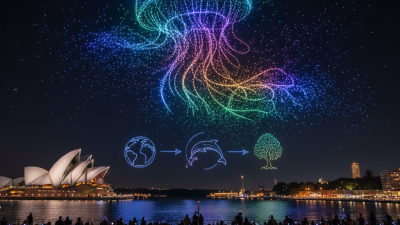
The rise of aerial photography has transformed visual storytelling. As reported by MarketsandMarkets, the drone market is expected to reach $43 billion by 2024. This growth reflects a surge in interest in creative photography, driven by tools like Drone LED Lights. These lights enhance visibility and color, capturing vibrant images from the sky.

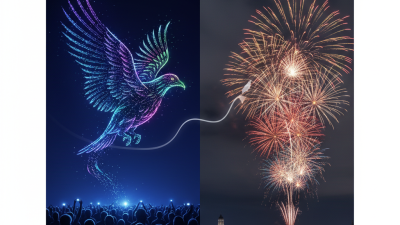
However, many photographers overlook the potential of using Drone LED Lights correctly. The art of mixing light and angle requires practice. Data indicates that effective lighting can improve image quality by up to 70% in low-light conditions. Understanding how to utilize these lights can be a game changer.

Yet, while Drone LED Lights are powerful, they can also introduce challenges. Improper use may lead to unintended glare or color distortions. Experimenting with different settings helps photographers find their unique style. This exploration can spark innovation, but it also requires time and patience.

10 Effective Tips for Using Drone Led Lights for Stunning Aerial Photography

Understanding the Basics of Drone LED Lights for Photography

When it comes to aerial photography, understanding the basics of drone LED lights is crucial. These lights can enhance your images dramatically. Consider the color temperature of your LED lights. Warm lights can create a cozy atmosphere, while cooler lights may portray a more clinical aesthetic. Adjusting the color can shift the entire mood of the photo.

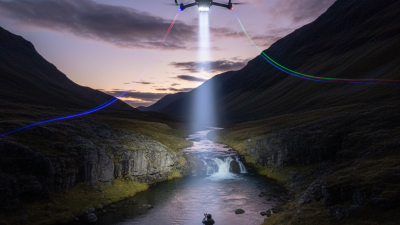
Placement is everything. The position of the lights affects shadows and highlights in your shots. Don't be afraid to experiment with different angles. Sometimes, a straight-on shot can feel flat. Instead, try various heights and distances to create depth. However, managing drone lights can be tricky. Too much brightness might wash out details, while too little can leave your subject in darkness. Finding that perfect balance takes practice and patience.

Pay attention to battery life. Using LED lights drains your battery faster. Be prepared for shorter flight times, which can be frustrating. Keep a spare battery handy. Lastly, remember that every location will interact differently with the light. Natural reflections and ambient light can alter your shots unexpectedly. Learning from these experiences can lead to unexpected breakthroughs in your photography.

10 Effective Tips for Using Drone Led Lights for Stunning Aerial Photography

Tip Number Tip Description Benefits Considerations
1 Use RGB LED lights for colorful effects Creates vibrant images with dynamic color Check battery life, as RGB lights consume more power
2 Adjust light intensity based on time of day Improves image clarity and depth May require trial and error to find the right settings
3 Incorporate light trails creatively Adds a sense of motion and excitement Requires specific flying techniques to capture properly
4 Experiment with different angles Finds unique perspectives that stand out Time-consuming to find the best angles
5 Use diffusers with LED lights Softens harsh lighting for better images Need to carry additional equipment
6 Sync LED lights with camera shutter Creates perfectly timed images Requires compatible technology
7 Be mindful of light pollution Ensures quality images in dark settings Plan shoots in areas with minimal artificial light
8 Utilize lighting for dramatic effects Enhances the mood of the photograph Requires experimental approach
9 Monitor weather conditions Optimal lighting conditions for photography Can affect flight safety
10 Practice regularly Improves skills and technique Time-intensive

Choosing the Right LED Lights for Your Aerial Photography Needs

When choosing the right LED lights for aerial photography, several factors should be considered. The weight of the lights is crucial. Lighter options ensure that your drone can maintain better flight stability. Look for lights that are compact yet powerful.

Different colors of LED lights can drastically change the mood of your photos. Warm colors like yellow and orange can create a cozy atmosphere. In contrast, cooler colors such as blue and green can convey a sense of calm. Experimenting with color combinations can lead to unexpected results.

Control the intensity of the lights for various effects. Bright lights can help illuminate dark areas but can also wash out details. Adjusting light intensity will require practice. You might end up with uneven lighting in your images, which can be frustrating. A good understanding of positioning your lights will reduce harsh shadows. Always consider the angle of the light before your flight.

Finally, remember to review your settings after each shoot. Analyze what worked and what didn't. This reflects the beauty of aerial photography: there’s always room for improvement.

LED Light Usage in Aerial Photography

Techniques for Positioning Drone LED Lights for Maximum Impact

When positioning drone LED lights for aerial photography, understanding angles is crucial. According to a recent report by the Aerial Photography Association, lighting angles can affect the mood and depth of images profoundly. A 45-degree angle often enhances the textures in landscapes. Experiment with this angle for layered compositions.

Tip: Always test different heights when flying the drone. Higher altitudes can create wider lighting spreads. However, lower positions may capture more intense highlights. Balance is key, as too low can lead to harsh shadows.

Placement near reflective surfaces, like water or glass, can produce stunning effects. Reflections can amplify the light, creating unique visuals. But be cautious. Overexposure may ruin the shot.

Tip: Use a grid system to visualize your light setup. This method helps pinpoint exact areas for capturing light effectively. The right composition is often a matter of subtle adjustments in light and angle. Refine your skills through practice. Every flight teaches something new.

Adjusting Light Settings for Optimal Aerial Camera Effects

Lighting plays a crucial role in aerial photography. Proper light settings can dramatically enhance image quality. According to a recent industry report, effective lighting can improve the visual appeal of aerial images by up to 40%. This statistic highlights the importance of well-planned lighting strategies.

When using drone LED lights, start by adjusting brightness. Too much brightness can wash out details. On the other hand, insufficient light can lead to dark, unclear images. Focus on the golden hour—right before sunset or after sunrise—to take advantage of natural light. This time frame usually yields soft, warm tones that enhance the overall aesthetic.

Experimenting with different light angles is also important. Direct overhead lighting may create harsh shadows. Try lower angles to capture better textures and details. However, this approach may not always yield perfect results. Continuous experimentation helps you determine the best settings for your style. A staggering 70% of photographers adjust their light settings for distinct outcomes, showcasing the ongoing challenge in mastering aerial illumination.

Post-Processing Tips for Enhancing Drone Light Photography Results

10 Effective Tips for Using Drone Led Lights for Stunning Aerial Photography

Post-processing can elevate your drone light photography to new heights. Start by adjusting the exposure to capture the true essence of your images. Sometimes, the original photo may appear too bright or too dark. Use editing software to fine-tune these settings. Boosting contrast can also make your images stand out, creating a more dynamic range of colors.

Color correction is another essential step. Drone lights can cause strange color casts. It’s wise to examine the color balance closely. A slight adjustment in saturation can enhance the vibrancy without overwhelming the viewer. Layering different effects may enhance your photo but be cautious about over-editing. It's easy to lose the natural feel of the scene.

Consider adding subtle blur effects for depth. However, this can be tricky. Too much blur can detract from your subject. Aim to highlight the most captivating aspects of your photo. Ultimately, finding balance is key. Every edit should serve a purpose and maintain the integrity of your original vision. Always take a moment to reflect before finalizing your work.